How to Create a Realistic Dual Lighting Effect in Photoshop 2025
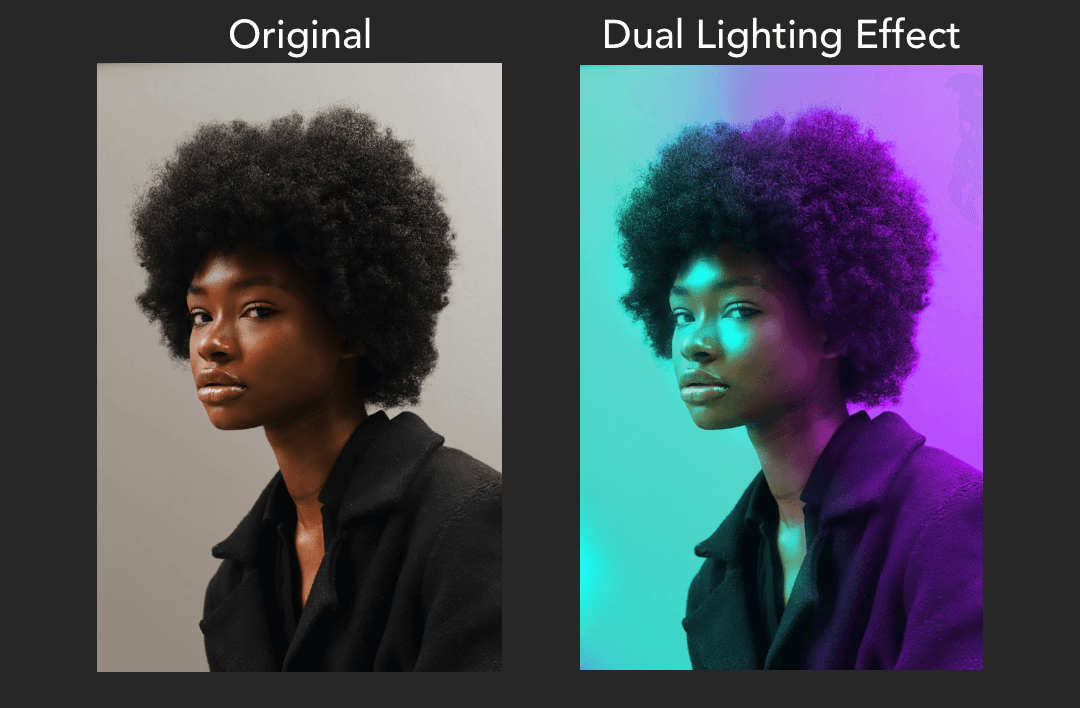
Transform your photos with a stunning dual lighting effect in Photoshop 2025! This video tutorial walks you through the step-by-step process to create a realistic dual tone look while preserving natural skin tones. Learn pro tips for blending colours seamlessly, using Blend If settings, and enhancing highlights for a polished, professional finish.
Master the Art of Dual Lighting in Photoshop: Achieve Stunning, Realistic Results Every Time
Adding a dual lighting effect to your photos can instantly elevate their look, giving them a dramatic and professional edge. However, many tutorials fail to maintain the original skin tones, leading to unnatural results.
This guide will show you how to create a realistic dual lighting effect in Photoshop 2025 that blends beautifully with your subject’s skin tones for a natural finish.
Why Choose a Realistic Dual Lighting Effect?
Dual lighting effects are a popular technique for creating dynamic and striking visuals. The key to achieving realism lies in blending the lighting seamlessly while preserving the original details of your image. Unlike other tutorials that oversaturate or completely mask natural tones, this method ensures your subject looks polished and authentic.
Step-by-Step Guide: Creating a Realistic Dual Lighting Effect
Step 1: Set the Foundation with a Solid Layer
Start by creating a solid colour layer and select the first lighting colour of your choice.
Open Blending Options:
Double-click the far right of the layer, or right-click and select Blending Options.
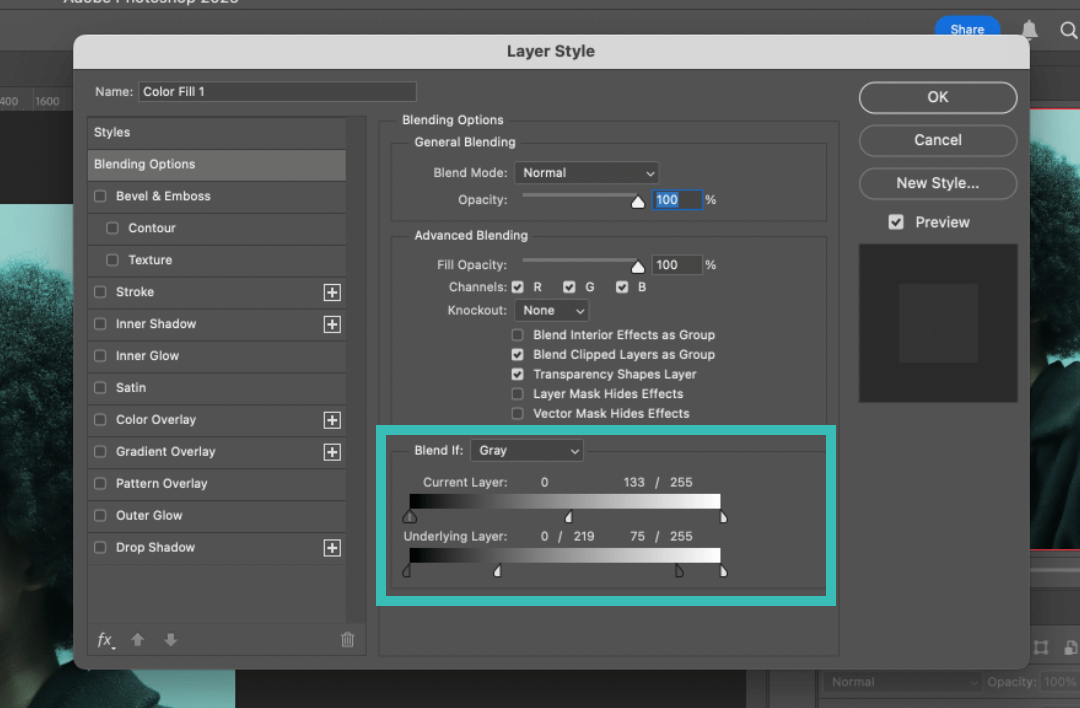
Adjust the Blend If settings:
Hold Option (Mac) or Alt (Windows) and click the dark arrow to split it. Drag it to the far right.
Do the same for the white arrow, dragging it to the left.
On the Current Layer, split the white arrow and drag it about halfway.
Click OK to apply the changes.
Step 2: Add the Second Lighting Colour
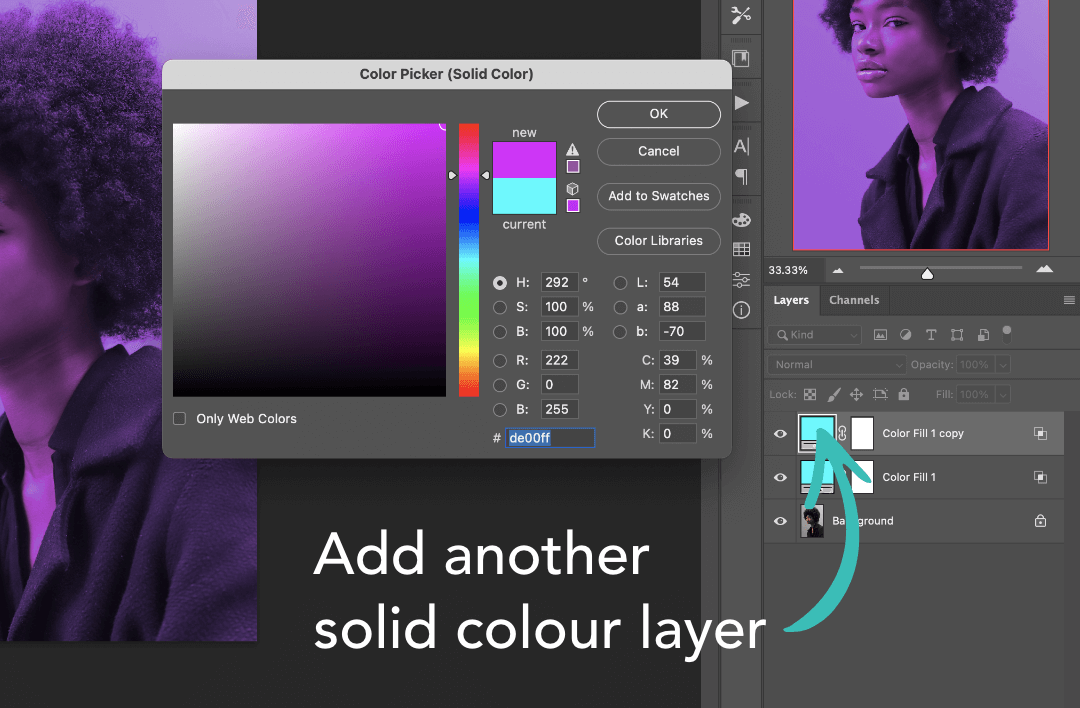
Duplicate the Colour Layer:
Use the shortcut Command + J (Mac) or Ctrl + J (Windows) to create a copy.
Change the colour of the duplicate layer to your secondary lighting colour.
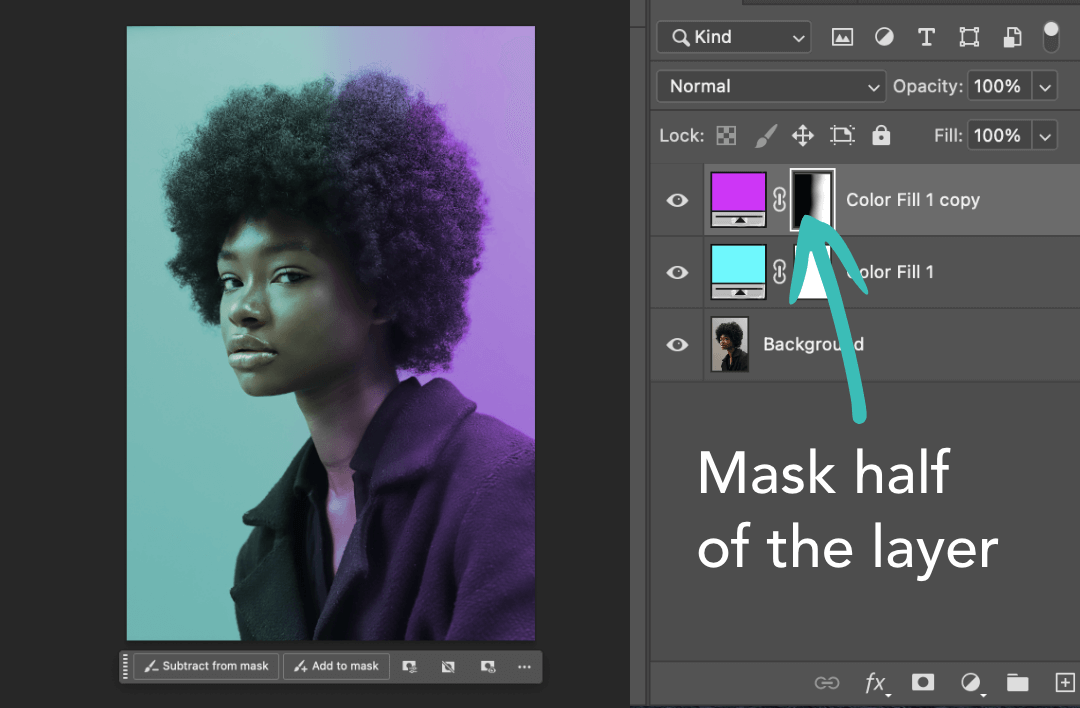
Mask the Layer:
Select the layer mask of the secondary colour layer.
Hit B to select the Brush Tool and choose a soft brush.
Press D to reset your colours and ensure black is the foreground colour.
Brush away the secondary colour from one side of the image, blending it naturally.
Step 3: Enhance the Lighting Effect
If you want to take the dual lighting effect further, follow these additional steps:
Highlight Key Areas:
Create a new blank layer.
Select the Magic Wand Tool (shortcut W) and ensure Contiguous is unchecked.
Set the tolerance to 50 and select the brightest highlights on your subject’s face.
Feather the Selection:
Go to Select > Modify > Feather and set the radius to 50 pixels.
Add a Colour Overlay:
Hit G for the Paint Bucket Tool.
Using the same colour as your lighting, click the selection to fill it.
Reduce the layer opacity to 50% or a level that looks natural.
Add a layer mask and, using a soft brush, remove the overlay from the background while keeping it visible on key highlights.
Step 4: Final Adjustments
Add a Hue/Saturation Adjustment Layer:
Slightly increase the saturation to make the colours pop without overpowering the image.
Fine-tune the image to your liking, ensuring the lighting blends smoothly and maintains realistic tones.
Watch the Full Tutorial
For a detailed walkthrough of this process, watch the accompanying video tutorial where I show you exactly how to achieve this effect step-by-step.
Final Thoughts
Creating a dual lighting effect in Photoshop 2025 doesn’t have to compromise realism. By following this method, you can achieve a stunning balance between dramatic lighting and natural tones. This technique is perfect for photographers, designers, and anyone looking to elevate their photo editing skills.
If you found this guide helpful, don’t forget to share it and check out the rest of my tutorials for more Photoshop tips and tricks.


