How to Remove Bars or Railings from an Image in Photoshop 2024
In this Photoshop 2024 tutorial, I'm going to show you the fastest and most effective way to remove bars or railings from an image. Whether you're dealing with distracting elements in your photos or simply want to clean up your image, this step-by-step guide will walk you through the process using Photoshop's powerful tools.
Step-by-Step Guide to Removing Bars and Railings in Photoshop for a Clean and Professional Look
Are you looking to remove bars, railings, or other distracting elements from your photos? Photoshop 2024 makes this process easier than ever with its powerful tools and AI-driven features.
In this tutorial, I’ll walk you through the fastest and most effective method to clean up your images, giving you professional results in just a few steps. But, before we dive in, here’s a quick before and after.
Step 1: Prepare Your Layers
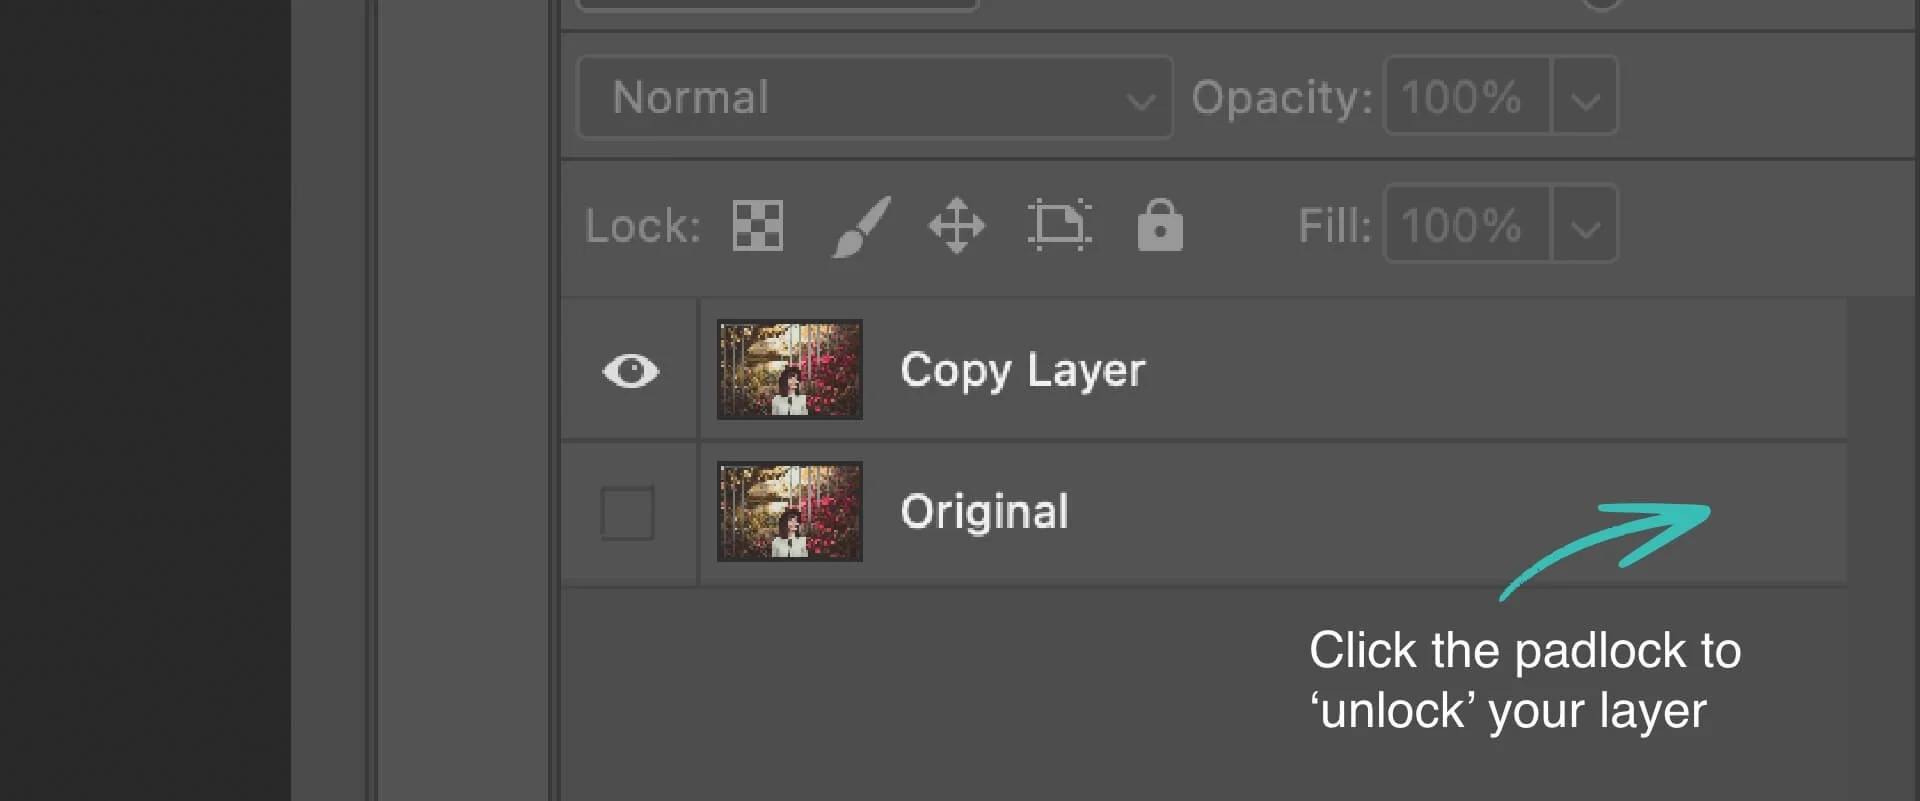
To get started, we need to prepare our layers. First, unlock your layer by clicking the padlock icon in the layers panel. Then, make a copy of this layer to work on by using the keyboard shortcut Control J on Windows or Command J on Mac.
To keep things organised, hide the original layer by clicking the eyeball icon in the layers panel. This way, we can easily revert to the original if needed.
Step 2: Use the Object Selection Tool
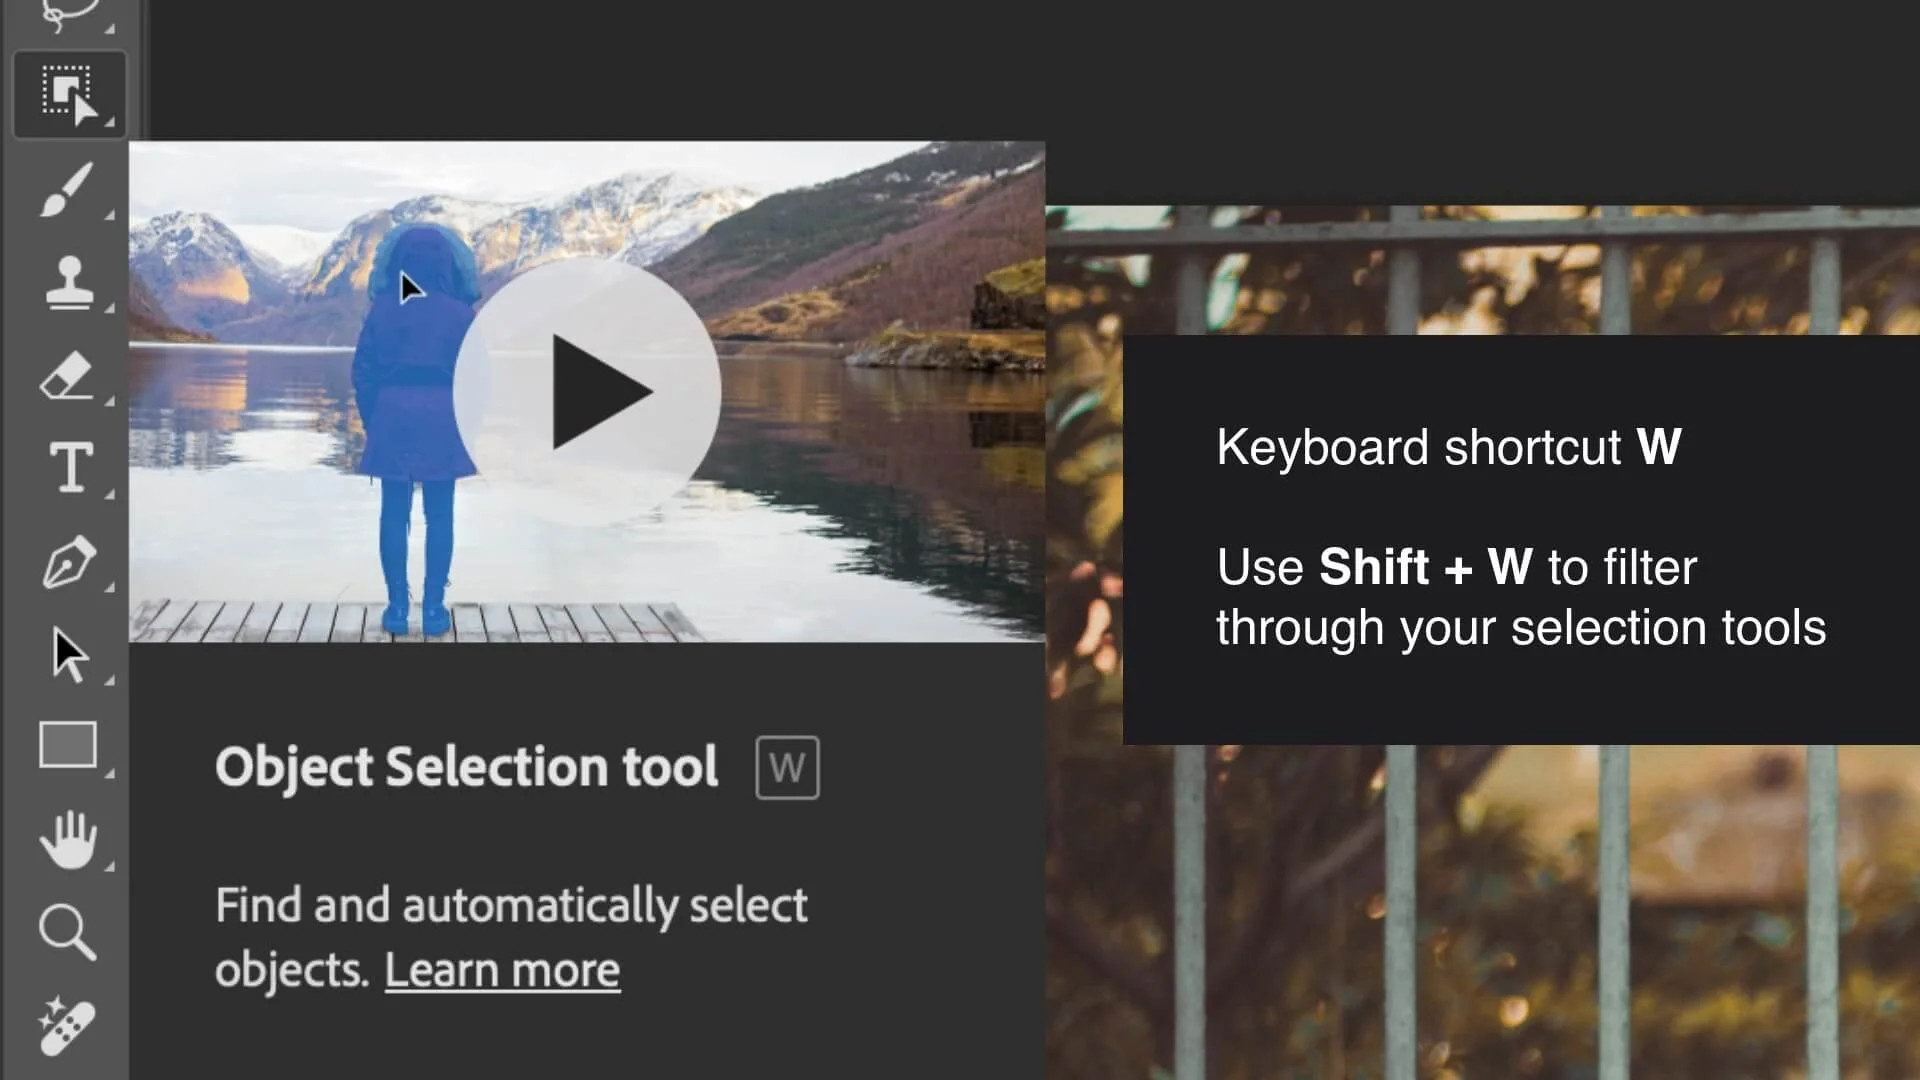
Next, we’ll use Photoshop’s Object Selection Tool, which is powered by Adobe’s AI technology.
Hit W on your keyboard to bring up the selection tools, then press Shift + W to cycle through until you have the Object Selection Tool selected.
Hover your mouse over the background, and you’ll notice that Photoshop intelligently detects and selects only the background, leaving the bars out of the selection. Click on the background, and your selection will be made.
Step 3: Refine Your Selection
Before we remove the bars, we need to refine our selection to ensure everything but the bars is selected. If any part of your subject (e.g., a model) hasn’t been selected, simply hold Shift on your keyboard and click the areas you want to add to your selection.
For finer adjustments, zoom in and use the Lasso Tool (L on your keyboard). Holding Shift allows you to draw around areas you want to add to your selection, while holding ALT on Windows or Option on Mac lets you remove parts of the selection.
Step 4: Add and Invert a Layer Mask
Once you’re satisfied with your selection, it’s time to add a layer mask. In the bottom right-hand corner of the screen, hit the Layer Mask button. This will create a mask based on your current selection.
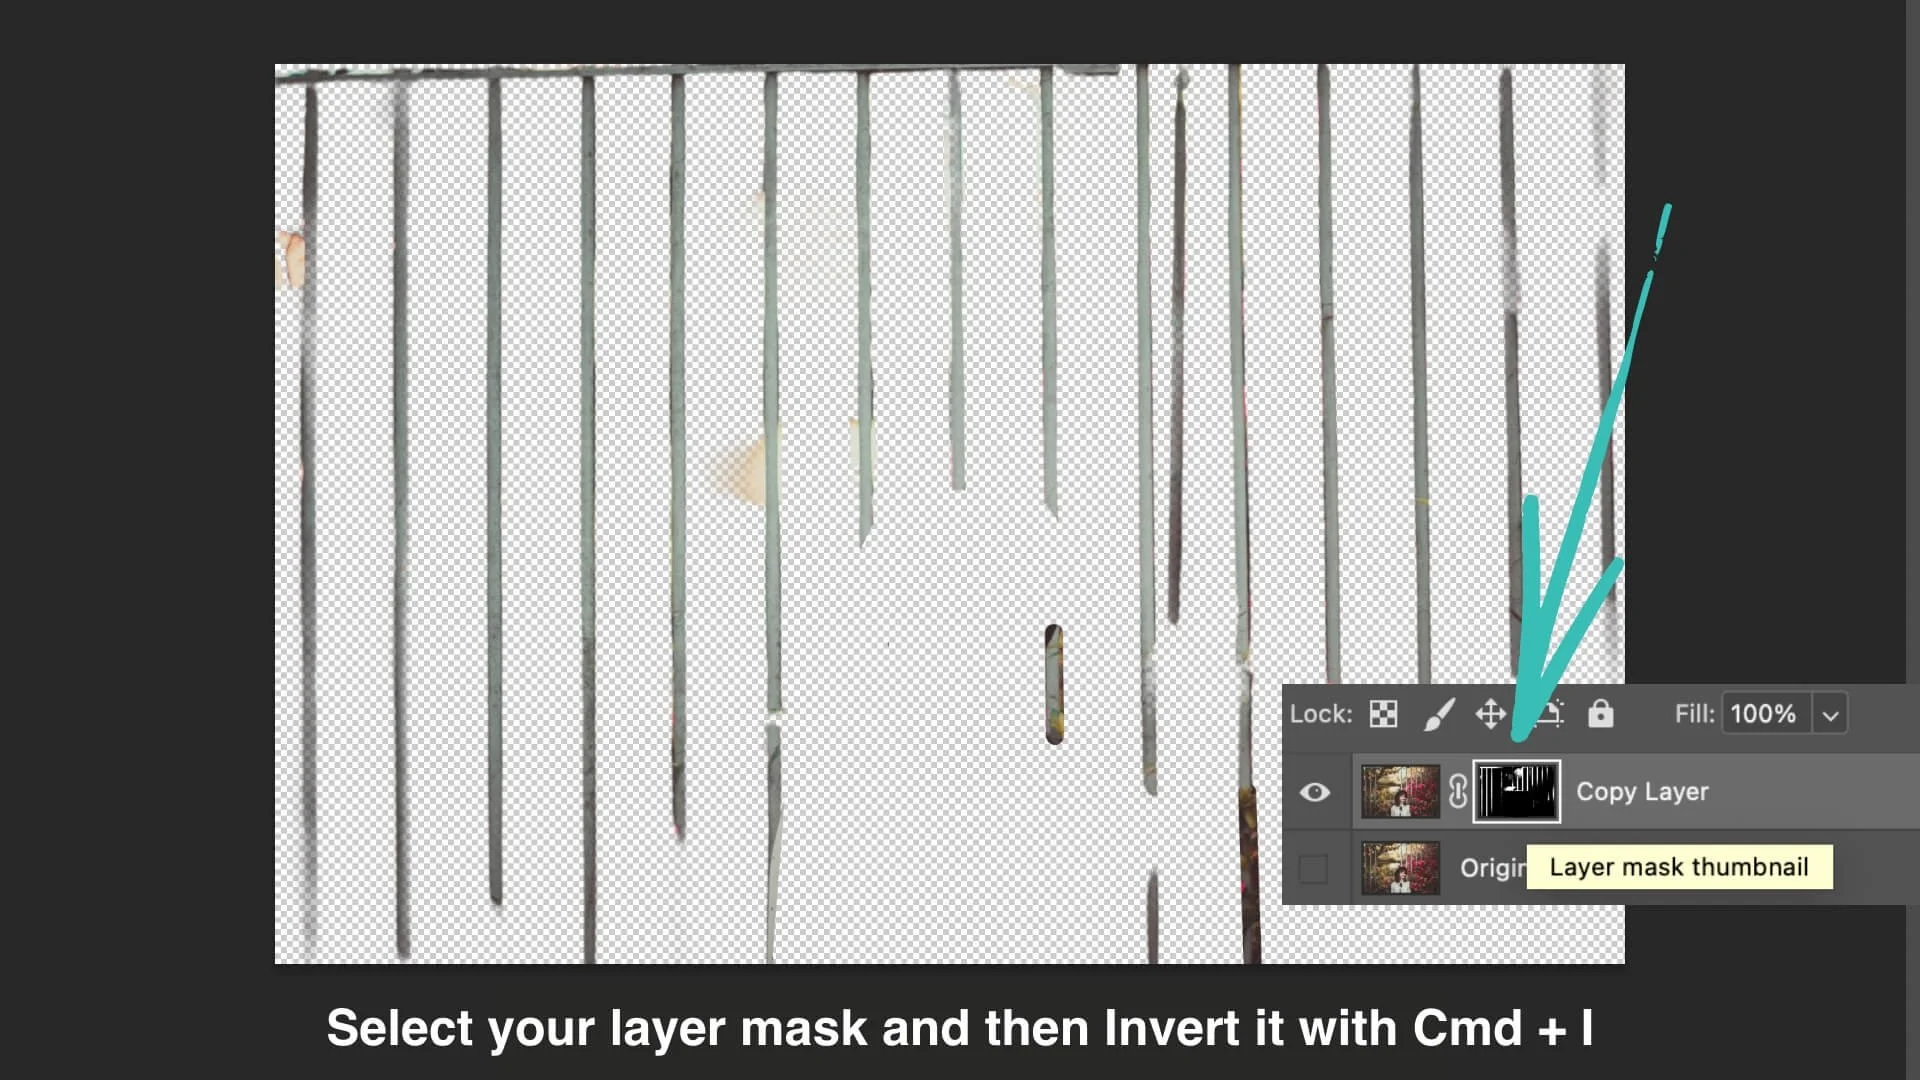
To prepare for the next steps, click on the layer mask in the layers tab and invert it using Control I on Windows or Command I on Mac. This inversion flips the selected and masked areas.
Step 5: Remove the Bars
Now that we have our mask, we need to remove the bars from the image. Select the mask by holding Control on Windows or Command on Mac. When you see a box appear on the cursor, click the layer mask to make the selection.
Make the hidden layer underneath visible again and hit Backspace to delete the bars within the mask. This step removes the bars and reveals the clean background beneath.
Step 6: Expand the Mask and Use Generative Fill
To ensure Photoshop’s AI has enough information to work with, we need to expand the mask slightly. To do this, start by making a selection of our mask. You can do this by holding down command and hovering over the mask.
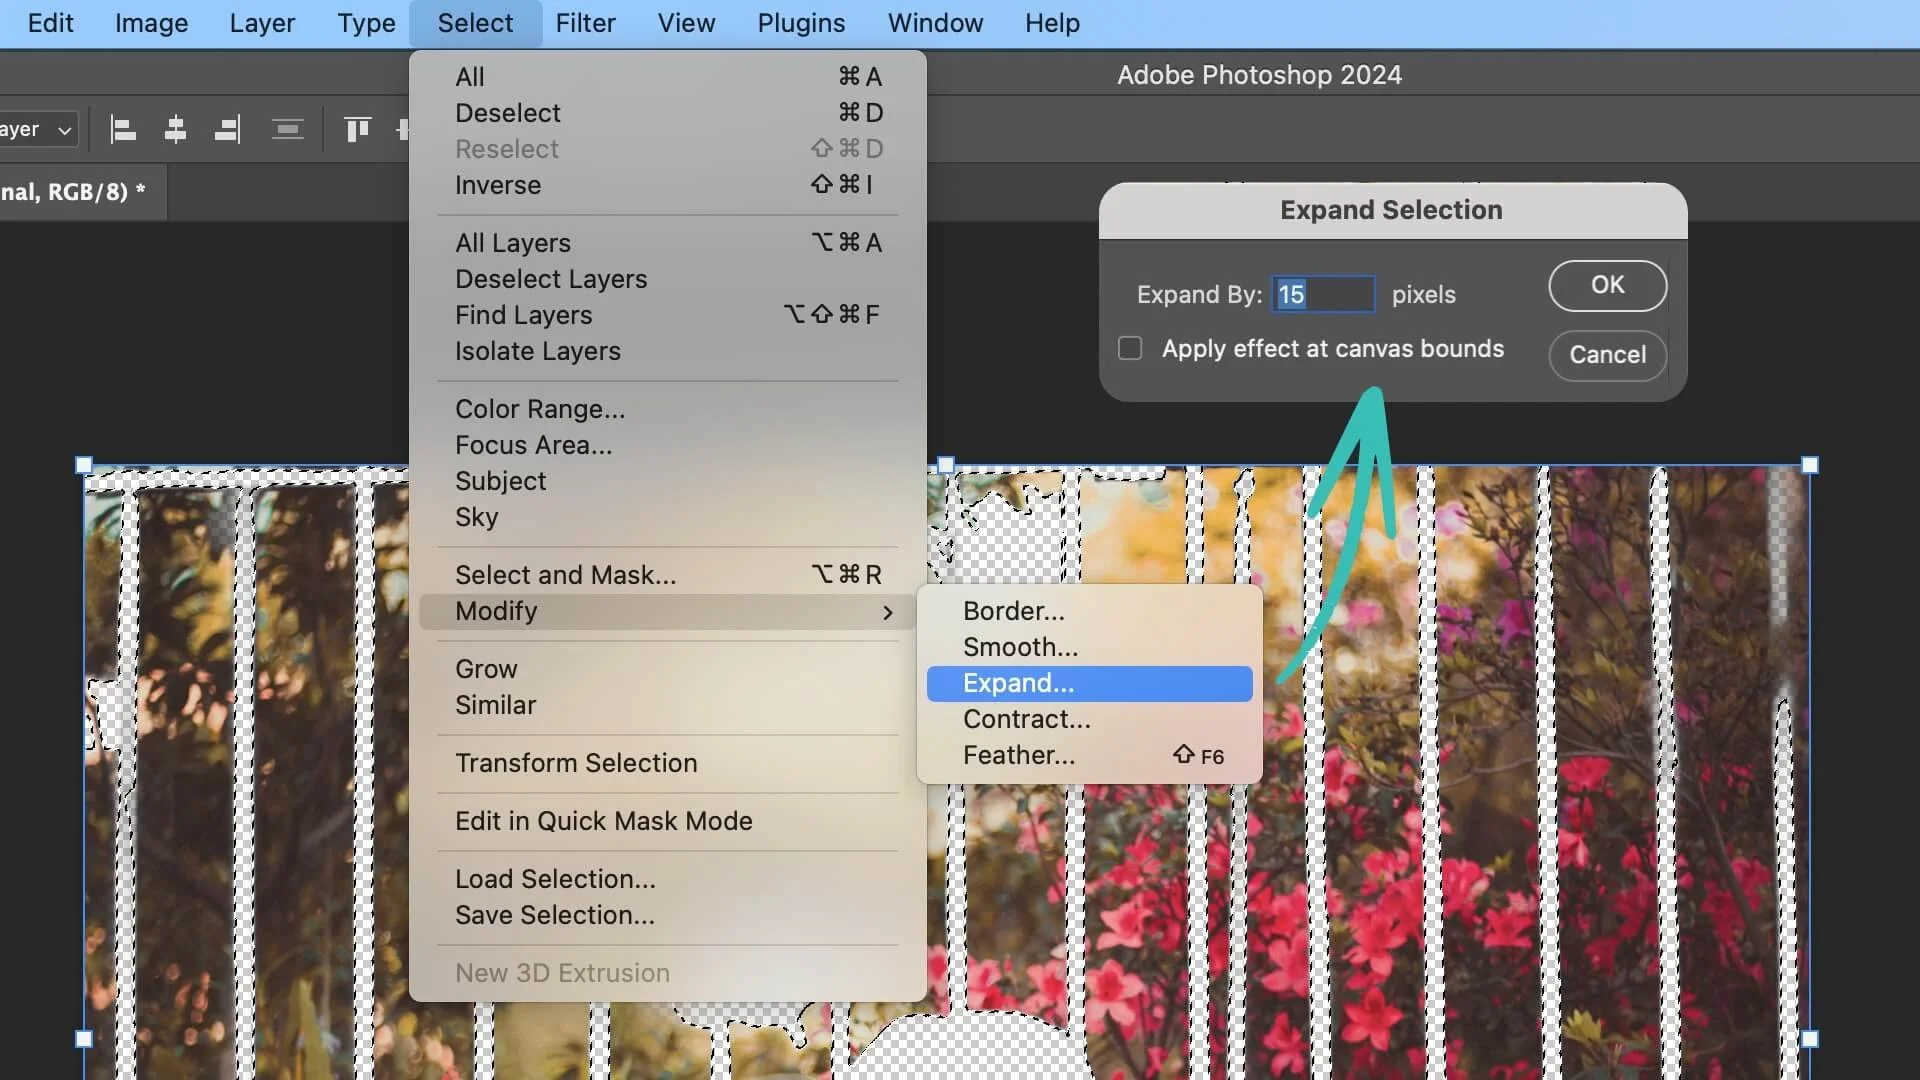
Next, head to the Select menu, choose Modify, and then Expand. A 10-15 pixel expansion is usually sufficient.
With the expanded mask in place, click into the Generative Fill box on the floating toolbar. Don’t type anything—just press Enter on your keyboard and let Photoshop’s AI do the heavy lifting.
Step 7: Final Adjustments
Photoshop’s Generative Fill does an excellent job, but it’s always good to double-check your work. Zoom in on your image to ensure no unwanted changes were made by the AI.
For instance, if you notice an issue with your subject’s eye or another detail, simply correct it by painting on the layer mask. Hit D to set your colors to black and white, then X to swap them so black is the active color. Make sure the layer mask is selected and paint over any areas that need adjustment.
Conclusion
And that’s it! You’ve successfully removed bars or railings from your image using Photoshop 2024. This method is quick, effective, and leverages the latest AI tools in Photoshop to make your editing process as smooth as possible.
If you found this tutorial helpful, be sure to like the video and subscribe to our channel for more Photoshop tips and tutorials. Thanks for reading, and have a wonderful day!


